Click on the pictures to make them larger
Showing posts with label Michael's Hutches. Show all posts

Friday, October 6, 2017

A new fabric display for the Quilt Shop

Back in the spring, I showed you how to turn this:
and this:
into these:
Bill cut the top cabinet sections off on the bandsaw which was incredibly helpful as pine is harder than it looks when you have a fine tooth saw and achy hands. I was left with 2 bases that I thought might be used down the road for sideboards.
The other day, I was looking through Pinterest (dangerous place! LOL!) when I saw a back to back fabric display that I thought I could duplicate for Marlene's Quilt Shop. I played around with the 2 leftover bases and liked what I saw.
I pried off all of the feet first and then realized that the ladies in the quilt shop would very likely trip over those corners near the floor.
Then if I put feet on the whole thing, they would be barking their ankles....who says I overthink things? ;) So I placed each piece in my miter saw and sawed away. 
Very good workout for the triceps...on 1 arm anyway. After some sanding, I applied some wood glue to the back of each piece,
spread it around and clamped it together.
I used a damp rag to clean up the excess glue and let this whole thing sit for awhile while I went and ate some lunch. I took it out of the clamps and decided it needed feet so dug through my bead stash and found some old pony beads that look just right.
This is going to be white, so I was lucky to find white pony beads in the container. So here it is with the knobs I glued in waiting for its first coat of paint.
And of course, I had to try it out in place...
Now I get to make about 30 more fabric bolts, and the Quilt Shop will have more storage too.  Looks like I'll be back over to Marlene's house with my scissors...Have a great day!

Sunday, March 19, 2017

Finishing Work on the Tall Cabinet...

After cleaning up the kitchen, I decided to go into the shop and start the third fabric bolt cabinet. The first thing I did was burn off a bunch of calories sawing the overhangs off of each piece.
After all of these were cut flush, I started to reach for my little yellow sander. The minions stopped me. "Remember to use your dust mask!" they said. Since I am an obedient master, I put it on only to have all of them laughing hysterically. (They do that alot...)
They got ahold of my dust masks again!
After the hilarity died down, I told them now they owe me those banana donuts I've been smelling for the last two days. They wandered off muttering that I was a party pooper. What I put up with around here....So, here we are back at the cabinet sanding away.
These cabinets are alot easier to sand while they are in pieces so each piece got a thorough sanding and I got them ready to be glued together.
Here it is all assembled!
Tomorrow, we can start painting. My sister-in-law has a cat and I found one that I think will work in her quilt shop; that's her on the lavender cabinet...or is it a him, I'm not sure now. Anyway, after all this work, I think I deserve a cookie don't you? Have a great day!

Saturday, March 18, 2017

I Love Saturday!

I couldn't get to sleep last night so wandered into my shop to start putting together one of the fabric bolt cabinets. Dear Hubby was contentedly snoring, so I didn't think he'd hear me making a ruckus in the shop. I pulled out this cute little hand sander that I found in my toolbox.
The sandpaper strips stick with velcro and the yellow part is a soft foam that doesn't hurt your hand and I can't for the life of me remember where I got it! It's an inch wide and 3 1/2 inches long and I searched the internet and couldn't find it anywhere. I will keep looking as I just love this thing and I think you will too. It worked perfectly sanding these little hutches and got into corners that my fingers couldn't. As soon as I find the place I bought it, I will let you know so you can buy one too. Once I cut off the overhanging parts of the hutch, I glued the parts together and into the clamps it went.
I used pony beads for the feet on these and the feet on the first one have snapped off a couple of times. I tried this glue on the feet for this one, hopefully it will hold better.
Here it is ready to paint!
By then it was 1 in the morning, so I decided to go to bed rather than start the next one. Today, I decided to make some homemade cookies as it has been awhile since I made any. I had this recipe held up with a magnet on the side of my fridge so thought I would give it a try.
Mmmm, looking good so far.
I took the first batch out and turned to put the next one in. When I turned back around, there were the minions each claiming a cookie!
I was a little hesitant to take this guy's cookie away...
They came out delicious, even with the minion footprints. I used mini chips and I think they would be just as good with 2 cups of chips instead of 3 but I will leave that up to you. :) I wandered out to Dear Hubby's shop and he was cleaning out his old toolbox...guess what I scored:
Even if I don't use them, when Bill is working in the house, many times I have the tool he's looking for so he doesn't have to go all the way out to the shop. So it is 70 outside today and the sun is shining, hope you are having a great day!

Friday, March 17, 2017

Topless Cabinets! Oo! La! La!

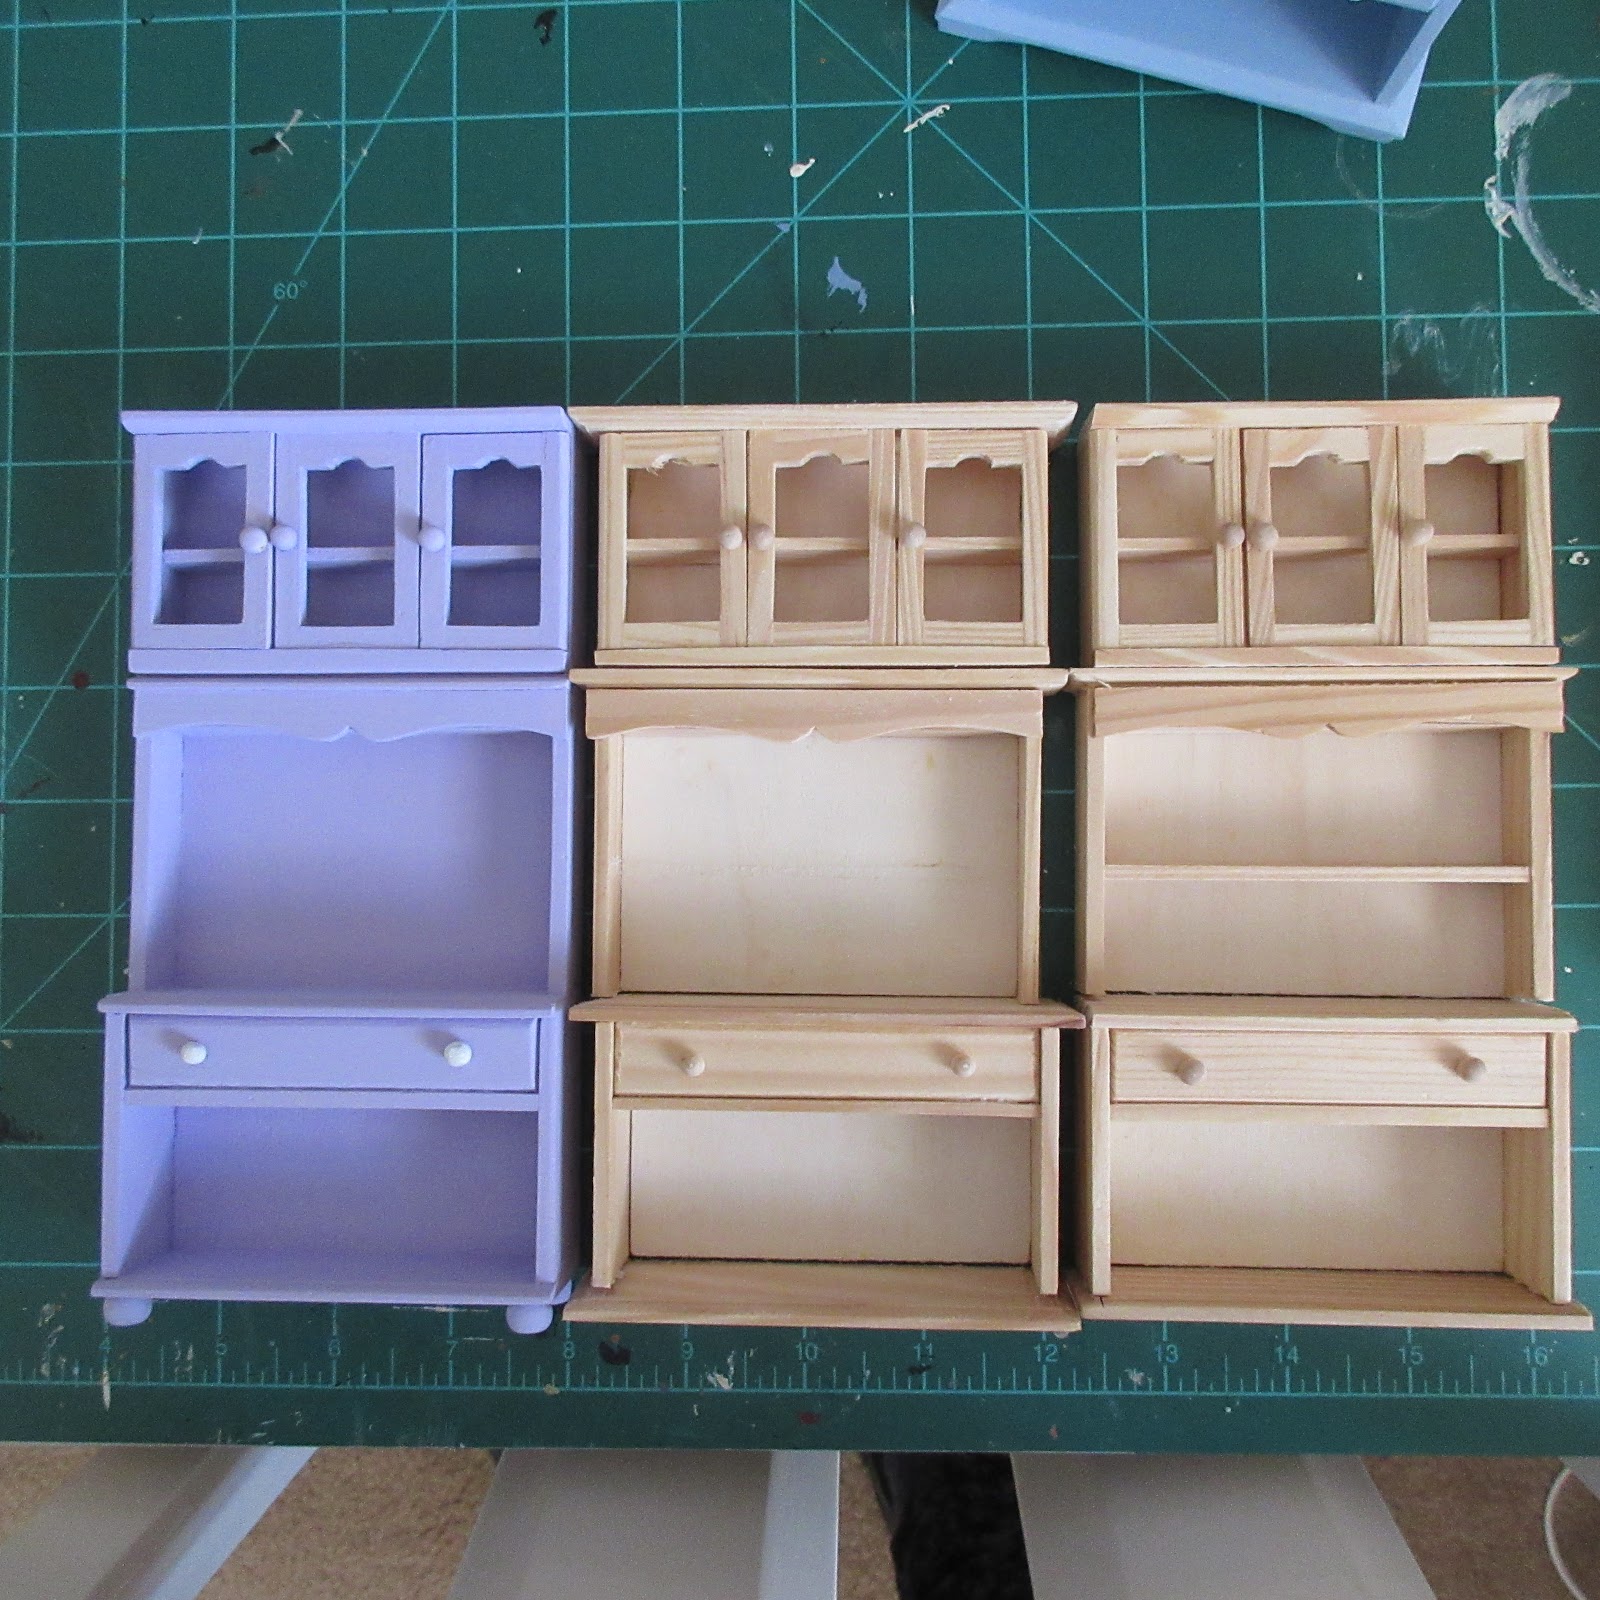
Now that the sideboard is done, I got started on the remaining two fabric bolt display cabinets. This is the one that Dear Hubby is going to cut on the bandsaw.
I'm a chicken when it comes to bandsaws..heard a story years ago about a girl who sawed her hand off by accident in an art class. So, I leave the bandsawing to my Hubby who is much more familiar with it. I have 2 of these cabinets that I need to have the tops cut off of, so Bill set up his saw and very carefully cut them for me.
So now I have the two tops that I need.
I was also left with two topless cabinets that look like they could be made into something too....Ahhh! Don't get sidetracked!
As I was typing, Bob was being very "helpful" by reading everything out loud.
When he got to the word "topless", pandemonium broke out in the shop and before I knew it, all the minions were scrambling up onto my keyboard to take a look-see.
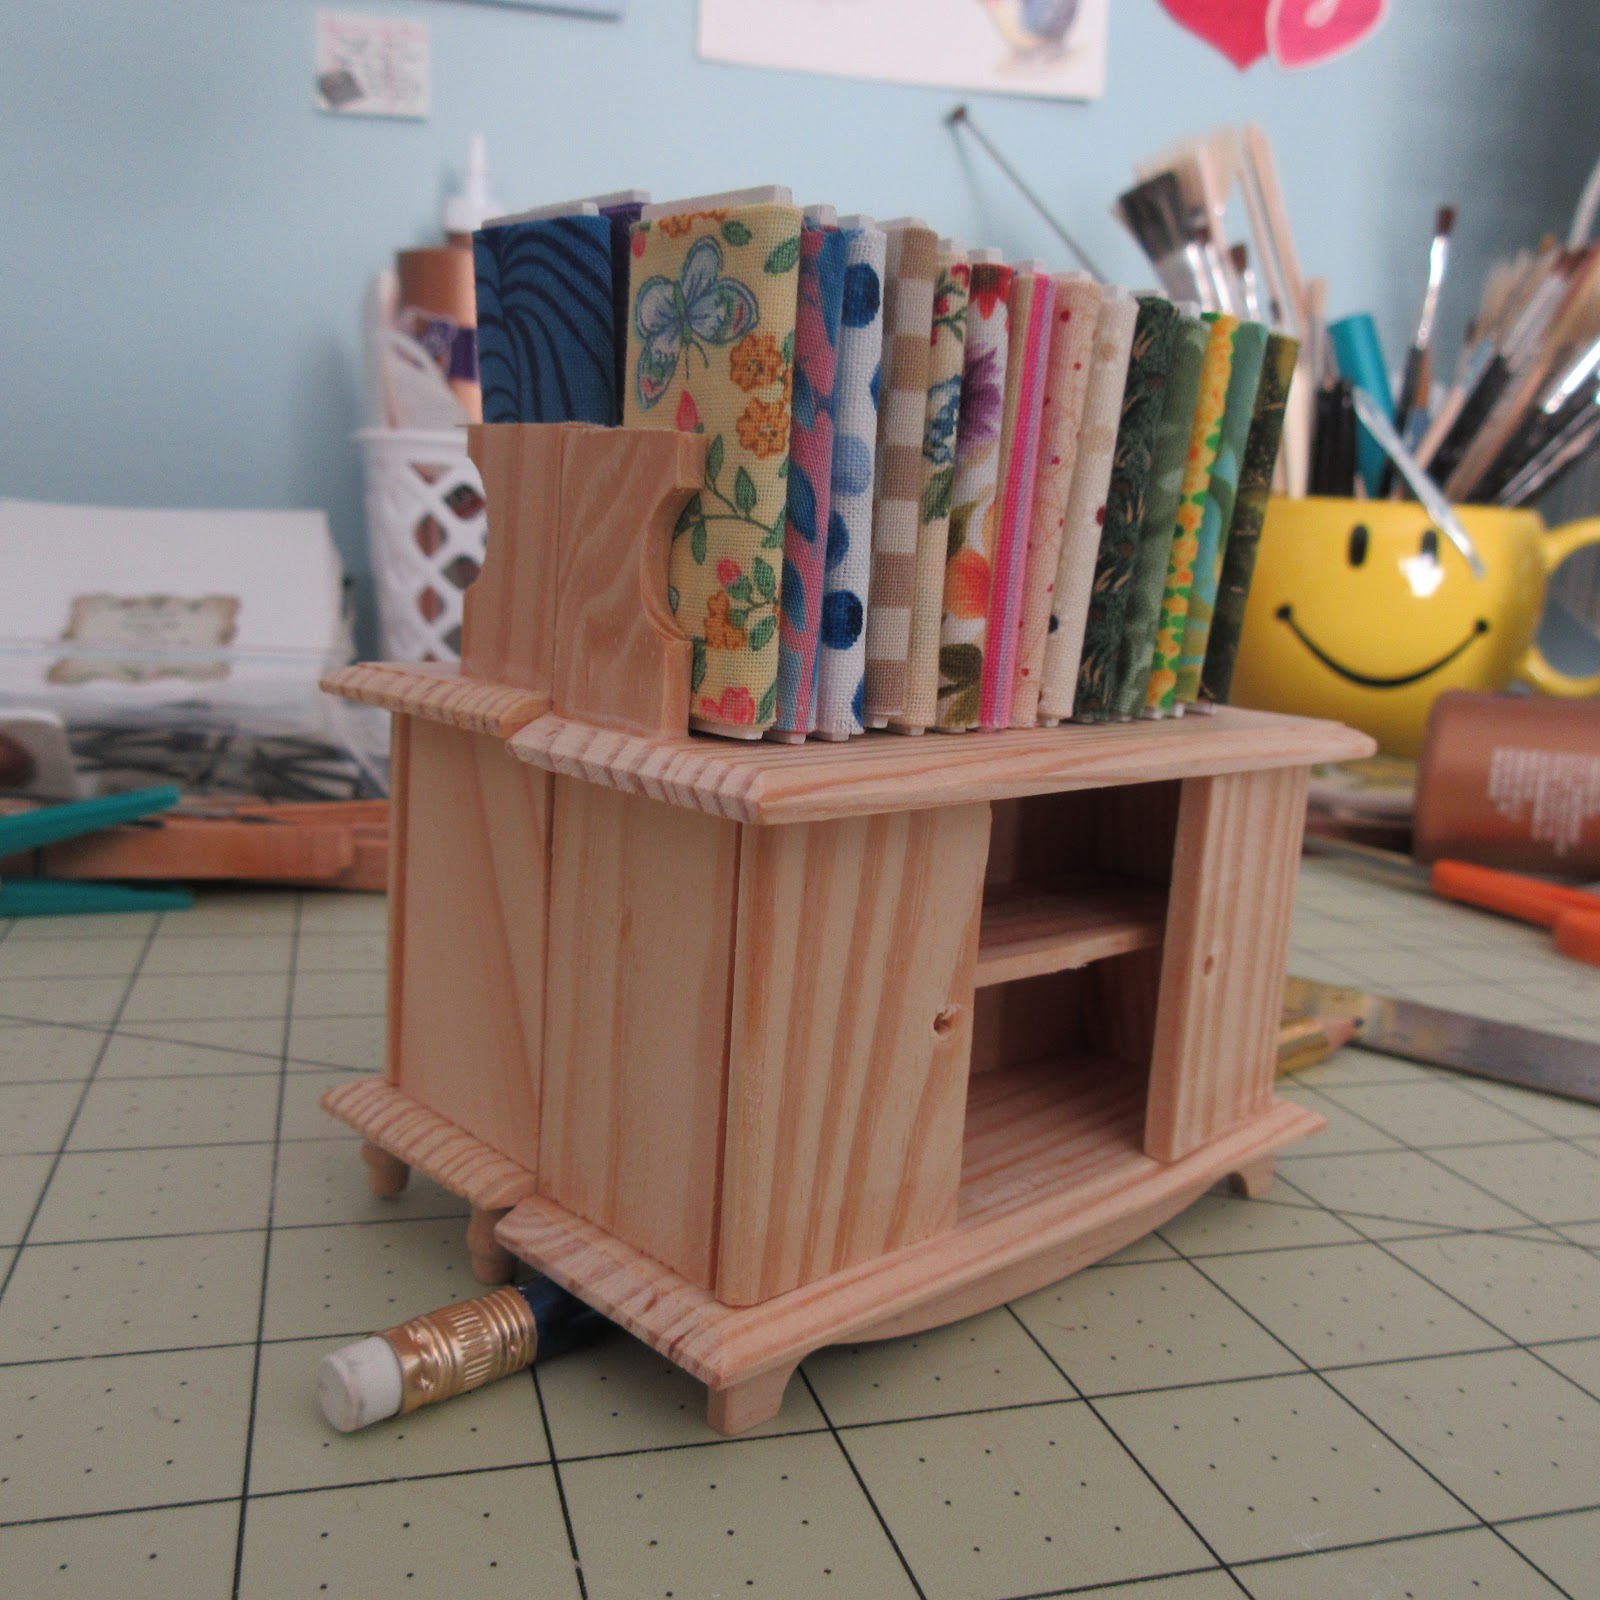
They were all disappointed and I said, "Hey, this is a family blog!" So they all moaned and went back to mind their shops. I smelled banana donuts cooking earlier, so maybe they will share some with me...Yum!  I just set the pieces together on my bench and realized I had a shelf to remove and also some pieces to saw flush with the sides.
As long as these fit tight against each other, they will fit on the back wall of the quilt shop. After a few seconds in the microwave, the shelf was removed.
I thought while I was there, I would try removing that middle door from one of the topless (still talking about the cabinet guys....stay put!)cabinets. Silly minions. I saw a cabinet in Walmart the other day with a shelf in between the two doors and like how it looked. It took a little longer to get the door off, but I succeeded.
This has some real potential, I am going to see what I can do with this after I've done the quilt shop. Oh, and did I mention that I cleaned up another section of my shop?! I have been trying to work around piles of other projects and finally decided to separate and organize all the stuff that wasn't part of the quilt shop. So here it is, all cleaned up and ready to make another mess on! LOL!
Have a great day!

Wednesday, March 15, 2017

Sideboard is done!

With all the news about blizzards and such last night, I was wondering what I was going to wake up to. It did indeed snow on the mountains
and this was what I saw when I opened the blinds on the back door:
It was pretty chilly though, somewhere in the teens this morning! Brrr! Good day to stay in and work on the sideboard. This is how it came out after a second coat and with the knobs painted white.
The clear finish I used on the cutting table seemed a little too shiny so I decided to try this one.
Still more shine than I would like,
I'll have to look for one with a lower gloss. Who would think that "satin finish" would be this shiny? I thought a doily would look nice on the top. I searched through my scrapbooking stuff but came up empty. Then I remembered that I have some small paper doilies that I like to use under teacups up in my cupboard. After looking it over, I cut a section out
and glued it to the top with glue stick.
Also discovered something, don't use glue stick on paper doilies...it kind of filled up the holes and got a little gunky. I should have remembered to pull out the E6000 Extreme Tack, I think it would have worked better.
The next thing I need to tackle is the lavender cabinet that will hold fabric bolts. I painted the knobs white and need to sand and second coat the top where the doors are.
I still need to saw the tops off of a couple more Michael's hutches to build the other two and I can't for the life of me remember how I did it on the first one. I had cut these about two years ago and set them aside for another project so it has been awhile. Dear Hubby has agreed to cut them on the bandsaw,
so I will post pictures so you can see him at work. Hope you enjoy the pictures today, there are alot of them! Have a great day!

Monday, March 13, 2017

Painting the Sideboard and more...

This morning didn't start well. I learned that you don't put cracked pop-tarts in the toaster. Part of it broke off and caught fire. I turned and saw a small flame coming out of the toaster! Dealt with that right quick and continued on with my day. At noon I decided that I would pop one of those small banquet berry pies in the microwave. I always use the minimum time on the microwave just in case. I was supposed to leave it in there until it was "golden brown and emitting steam". Well it wasn't brown and there seemed to be quite a bit of steam. When I opened the microwave door, it wasn't steam, but smoke! Good grief, I burned this too. So as you can imagine, it was with much trepidation that I entered my shop this afternoon. I figured I'd be pretty safe with a bottle of paint and a brush. After thinking about the color I should paint the sideboard, I remembered that my sister-in-law had mentioned that she also liked blue, so I dug out my Folkart Baby Blue paint
and gave it a go.
These hutches are made of pine which has a grain pattern that is far too large to look in scale, so I always like to use paint on them. I did up four of them awhile back and was very happy with the results.

So this little sideboard got its first coat of baby blue and was set aside to dry.
The minions were curious about the smoke in the air earlier in the day and they had a great old time teasing me about my cooking skills. They said next time I should stop by their Outback Steakhouse and they would cook for me. I think I might just take them up on it tomorrow! Have a great day!