or work in the shop....guess which one won! LOL! It is the weekend after all...So I put on my work apron and decided to make more fabric bolts for the quilt shop. One day last spring, I was over at my sister-in-law's house and she let me go through her scraps to find fabrics. I knew the approximate size of the finished bolt, so happily snipped away while she worked on one of her beautiful quilts. I came home with pieces enough to make at least 100 fabric bolts!
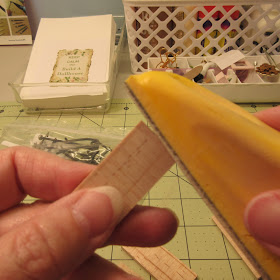
I can't remember if I showed you how to do this before, so made sure I took pictures of the process. Earlier, I had purchased some 3/4" wide stock that was 1/8" thick. These came in long pieces so all I had to do was cut 1 7/8" pieces to start the bolts. I sanded the ends smooth with my favorite sander
and got them ready to paint.
Speaking of my sander, I know I promised I'd let you know where I found it and what the packaging looked like. I have been looking for quite awhile and finally found it at Lowes. They must have been out of stock as I have looked there multiple times. So here it is!

It was available in a couple of different grits and comes with a generous amount of hook and plush strips. I was wondering what I would use after the strips ran out as Lowes didn't appear to stock them. Well, Bill received a catalog the other day
and while I was looking through it, I found that you could buy this type of sandpaper by the roll.
So when I run out, I know where I can find more. Just a short rabbit trail...now back to the fabric bolts! While the first coat of paint was drying, I went through my pile of fabric pieces and picked out enough for the bolts that I had cut. I starched and ironed each piece
and then folded them in half and ironed them again.
I took a brief break to add a second coat of paint to the ends of the bolts and then trimmed each fabric piece to measurements I had taken
I put some lively music on for this part and before I knew it, I had a small pile all finished...

and I had to try them out in the second hutch.
I have one more hutch and then I want to make more fabric bolts to scatter around the shop, add to the cutting table, etc. I hope this has been helpful to you and that you are inspired to build a fabric shop or quilt shop for someone you care about. Have a great day!


No comments:
Post a Comment