Click on the pictures to make them larger

Monday, September 28, 2015

Steampunk Tudor

To start with, I finally figured out the "Label" feature, so now you can scroll down on the right and look up something specific that you are interested in. I've seen this on other blogs and it seems like a very handy feature. Starting a new build today; our second 1/4" scale building. A little bit Tudor, a little bit steampunk and a whole lot of fun! I started by trimming off the little nubbies left from punching out the cardboard pieces.
I wanted to see what these would look like painted, so here is one and two coats of Ceramcoat Burnt Umber.
Looks like I'll need a third coat too. After all the trim pieces are painted, I'm going to give them a quick spray with my Clear Matte spray to protect the paint. It seems like it would scratch off too easily at this point. I also laid out the pieces to this build to see which way everything should go. The end pieces seem interchangeable, so I will dry fit and see which end I want the large window on.
I searched the internet for images of Tudor houses and saw that many of them have brick or stone on the lower section.  I have some fabric that I picked up a few years ago that I think might work.
Whenever I see fabric with stone or bricks or wood planking that looks in scale, I buy a 1/2 yard to stash. Oftentimes, you never see it again and it's fun to use. The upper part of the peaks will be paint that I have stippled on.  Two coats so far, not sure if it will need a third.

I have a few ideas for steampunk effects, but I don't think they can be added to the building until after it's nearly complete. I made sure to sand carefully on the inside of the window frames as these will need to be painted and will show from the outside.  Looks like that will be all for now as I have to make a trek to Walmart today. Oh, one more thing.  Here is a pic of the bases that I picked up to put these builds on: 
They are made of plywood and are laser cut. Makes a nice, sturdy, flat surface to fasten the house to and leaves a little room for landscaping.  Have a great day!

Sunday, September 27, 2015

Running the Planer...

Busy day today!  Doc came by to help Dear Hubby work on the next two bookcases.  These are made out of cherry and look very beautiful when done.  So I got a few shots of them working and then made a short video of the planer itself.  Loud as anything!

When you watch the video, you will know why they are wearing ear protection!  Even the minions didn't want to hang around and watch...they all ran back to the shop while I was filming trying to hold their hands over their ears.
Looks like this is going to take awhile! The guys are still going.....don't you just love watching men at work?!
After the minions got settled, the Banana Farmer wanted me to set up all of the things I have so far and take a picture. So here we go...
As soon as the other items arrive this week, I will take an updated picture.  At last the video is processed....
https://www.youtube.com/watch?v=iImrlRgXWZw

Saturday, September 26, 2015

Starting the Landscaping...

Now that the banana barn is done, that would've made a good name too..., I decided to start the base for it.  The laser cut rectangles were on sale in Michael's up near my mom. I should've bought 8, but I wasn't sure if they would work.  At .79, I could have, but I am a thrifty Yankee! LOL! The first thing I did was paint one side brown.  
I noticed that the sheet moss I want to use is somewhat see-through and didn't want the bare wood to be seen. Also, finally had a brainstorm about how to deal with the very messy moss sheet. I sprayed it with clear matte spray!  

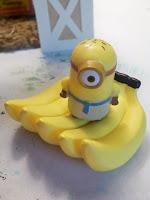
Not only did it tame the flying moss, it brought out a little of the green too.  I've had this roll of sheet moss for I don't know how many years so I know it's a bit faded but it worked for what I needed it for. I applied it to my base with Elmer's white glue and, the usual, waited for it to dry. Once that was done, I glued down the building the same way and started on another small project.  My mom gave me the large hand of bananas and I thought it would make a great photo opportunity for tourists.  Using my rotary tool, I drilled a hole in the side of the bananas at the angle I wanted and glued in a short piece of bamboo skewer.  I drilled a hole in the base and glued that in too.  
The Banana Farmer talked to the newspaper photographer about doing some freelance work on the weekends to take care of the tourists who want their pictures taken.
So he is really getting into owning his own small business. When I showed all of this to my husband, he pointed out that the banana harvester needed a ladder to reach the bananas.  So I dug around in my stash of stuff and found a plastic ladder from an old game and cut it down to fit.  
So while we are waiting for the second banana tree and the crates of bananas to arrive, I think I will start the next build...I am really liking 1/4" scale! Have a great day!

Friday, September 25, 2015

Banana Leaf Roofing...

Thought you might like to see what kind of artificial plant I started with to make the banana leaves.  
I cut the individual leaves that I wanted from the bunch, rounded the end with scissors and then cut them to length with a combination of scissors and my wire cutters.  I tried using superglue this time instead of white glue and the progress was much faster....until I got to the last leaf.  Then for some reason, I had to go back to the clamps to hold it down long enough to dry.
When both sides were finished, I had to decide what to use for the ridge of the roof.  I was going to use sheet moss, but thought that one large leaf would look better.  I trimmed the leaf the size and shape I wanted but when I went to glue it on, let's just say it was being very resistant...so I resorted to every builder's alternative...More Clamps!!

While I was wrestling with this, I glanced over at the minions and it looked like I was being mooned!  

Upon closer examination, I realized that they had both face planted off the bleachers.  So I picked them up and dusted them off and apologized for bumping the bleachers and knocking them off.  They were a little huffy about me thinking their heads looked like their butts, but I gave them each a banana and all was forgiven. At last, the top leaf stayed on and I freed the roof from its clamps.  It was then glued to the building and I declared it done!
A local reporter from the Minion Gazette came by and shot some pictures and talked to the Banana Farmer about an upcoming article about new businesses in the community.
His head was a little larger after the reporter left, but I let it go. Later on, I went out to Dear Hubby's shop to see how the display shelf was coming along.  Looks like one more coat of finish and we can start using it!  
As soon as the new banana tree and boxes of bananas arrive, I will start landscaping around the banana farm and we can move on to the next house....it's going to be a little bit steampunk! ;) Have a great day!

Wednesday, September 23, 2015

More Corrugations and the Roof!

Started the morning dry brushing the Metallic Aluminum on the two end pieces.  After that dried, dry-brushed the Burnt Sienna and waited for that to dry.  Last of all, dry brushed a little Campground green along the bottom edge as the moisture was sure to get to this in the jungle.  


Just make sure you do the right edge...otherwise it will have to be hanging vines! LOL! I marked the back so I wouldn't reverse them by accident. As the pieces were sitting there drying, I thought why should I wait until they're glued on the building to add the trim...it was a lot easier putting it on while the pieces were lying flat.  
Made sure to glue the floor in before I put the corrugated pieces on...that way I could use clamps to hold it in place as the building was maybe just a little bit crooked...;)
The sign was glued to a piece of card and cut out and glued in place; once the floor was dry, the ends were glued on and I added the doors.
On to the roof! The Banana Farmer kept putting the crates of bananas in the building and I kept taking them out. Besides, I don't know where he got those bananas, but it says "Fairway Banana's"  on the ends.  Seriously? Oh well, maybe the minions won't notice...

Once the roof pieces were painted green, I glued them together along with the roof supports that I had stained with my Minwax pen.  It is slow going with the leaves, I can only glue on one at a time, clamp it in place and wait for it to dry to do another one.


I think I will experiment with a little superglue tomorrow to see if I can speed up the process....I have one very impatient minion here! LOL!  My dear hubby has been putting the finish coats on the shelving unit for all these little buildings, so we will check that out next. Have a great evening!

Tuesday, September 22, 2015

Applying the Siding and Trim...

I started cutting the pieces of corrugated for the sides first. That way, I can cover the edges with the front and back pieces.  At first, I thought I could just glue these on but then realized I had to put the windows on first. So painted the siding a basic grey and painted all the trim. Since I didn't want to get any paint on the windows, I dry brushed with some Metallic Aluminum paint and then touches of semi-opaque Burnt Sienna.  I'm sure regular Burnt Sienna would work fine, it's just what I had in my shop. I chose a tropical color for the trim because our Banana Farmer is a colorful guy! :)  
The windows were glued onto the outside of the building with a little white Elmer's glue. I just put a thin bead about 1/4" from the edge of the window opening so that none would show on the window when it was squished down.  
Siding was next,
and then I applied the window trim.  Now that I have  this completed to this point, I noticed that it looks similar to the miniature chicken coop I built for my friend Charlie: 
 
After the glue had dried, I cut the end pieces to slightly overlap the edges of the side pieces.  
These will undergo the same process of basic grey first and then once that it dry, they will be dry-brushed to match the sides.  
Almost forgot, I had to put the interior siding on slightly high to allow for the thickness of the sheet moss I glued on the floor. I will be back to show you the front and back dry-brushed and glued in place.  Nighty nite!

Monday, September 21, 2015

Corrugations and Bananas!

Started more work on the Banana Farmer's building.  Since the inside will be visible, I wanted to put corrugated cardboard on the inside as well as the outside.  The cardboard was packing material from a purchase awhile back...always save interesting stuff!  After thinking about how to apply it, started on the inside first as I felt it would be easier to get at without the roof and floor in place.  I held the cardboard in place with a couple of clothespins and traced around the front opening.  
The other end was done and I used some small sharp scissors to cut the window openings. Started with an exacto knife, but it didn't work as well as the good old scissors.  
The sides were done the same way and I added a bit to the height so it would be flush to the roof when you looked inside.  

I used Craftsmart Grey for a base layer and will add touches of silver and rust to add to the realism.  
I was thinking about metal siding in the jungle and thought there will probably be alot of rust and maybe some green here and there too.  So waiting for paint to dry and then I will start the outside.  I think I'm going to have to paint these pieces before gluing them on as there are going to be windows and I don't want to get paint on them. The Banana Farmer is getting eager to set up shop and ordered another banana tree online.  He has even set up a display of giant bananas for tourists to have their pictures taken with.  
Capitalism has invaded the Minion community! LOL!  Have a great day!

Saturday, September 19, 2015

Banana Farm and Mom's House!

Well, the banana farmer and I are back from our travels.  When I was getting ready to leave on Wednesday, I couldn't find him anywhere.  I thought he had changed his mind about going.  But when I got to my truck, he was already there with the truck started!  He was standing on the dash with his "finally, we need to get a move on" look.  
He decided to stay in my purse while I battled trucks on 81 while avoiding any unwanted interactions with the local constables.  As soon as we arrived, he wanted hugs from my mom and then offered to take her to lunch.  
It was decided that I could come along too since I was driving.....Shoney's here we come! Later on, we hit the local Goodwill in search of bamboo placemats and banana leaves....no luck.  So after enjoying some refreshment witth my mom,
the banana farmer decided to visit with the tribe of minions that live in my mom's dollhouse.  
He talked with the natives,

discussed planting techniques with the local banana farmer,
and even visited with Van Gogh while he was there.

The next day, it was my turn to invite everyone for lunch and we ended up at Cracker Barrel.  
I enjoy it there and so does my mom. The special was good but you-know-who was urging us on as Michael's was the next stop. We looked through scrapbook paper and artificial plants and finally decided that the banana farmer's building was just going to have to made from corrugated metal instead of bamboo. It would be more durable and probably wouldn't have to be replaced as often. Friday morning was time to say good-bye, so it was back down 81 and assorted back roads and we were home again.  Tried out the new leaves we found and found the corrugated cardboard I had saved so we were set for siding too.  
The little building was glued and clamped together and we wait for the glue to dry.  
I have some smaller corrugated that I might try although that means running a pizza box under the shower to get to the corrugations inside.....I think I might have a small piece of some pizza box corrugated left over from the chicken coop I built awhile back, so will have to try out both when I am ready for that step. Have a great day!